Copyright ©2017 Deborah M. Zajac. ALL RIGHTS RESERVED
I didn’t have anything planned this week-end because it was raining in the morning on Saturday, and when that cleared out for a few hours break before the rain returned that evening He-Man, Diva Dog, and I went to stretch our legs in the hills. We went up down the hills walking about 3.1 miles then we were slugs the rest of the day.
Today, Sunday I wanted to photograph water drops and splashes. It’s been raining so much I guess I have drops and splashes on the brain. 🙂
After breakfast and my first cuppa tea I set up my kitchen sink with diy water drop rig.
I thought others might like to know/learn how to do it so, I have written down the gear, and steps I used to achieve the images below.
In the first image below I have my trusty Nikon Df with my Nikon SU800 wireless trigger mounted on it, and both are mounted on my travel tripod. On a light stand next to that is my Nikon SB600 speedlight. I was shooting tethered using Lightroom’s Tether Capture feature on my laptop which is just out of frame.
I attached a doggie bag filled with clear water to the faucet with a rubber-band. I poked a little hole in the bag to drip into a bowl filled to the brim with water.
Under that is a colorful beach towel to create nice colors in the water, and catch any splashes and or spills. The little spoon behind the faucet I used to focus on by placing it in the bowl where the drops were falling then focused on that and switched to manual focus. The lens is a Nikkor 105mm Macro lens.

iPhone 7 Plus
I took a few test shots to get shutter speed, focus, and exposure set, then started trying to time the drops to get a few nice drops and splashes. You need to shoot a lot of frames to get the timing just right.
Here are a few of my favorites:
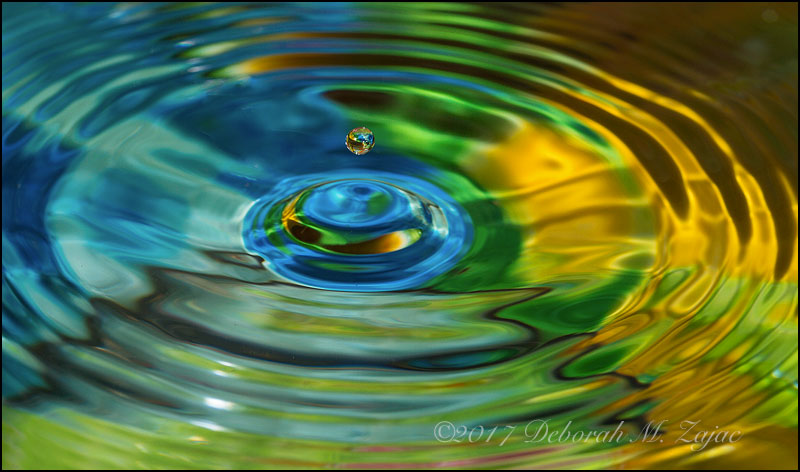
Suspended
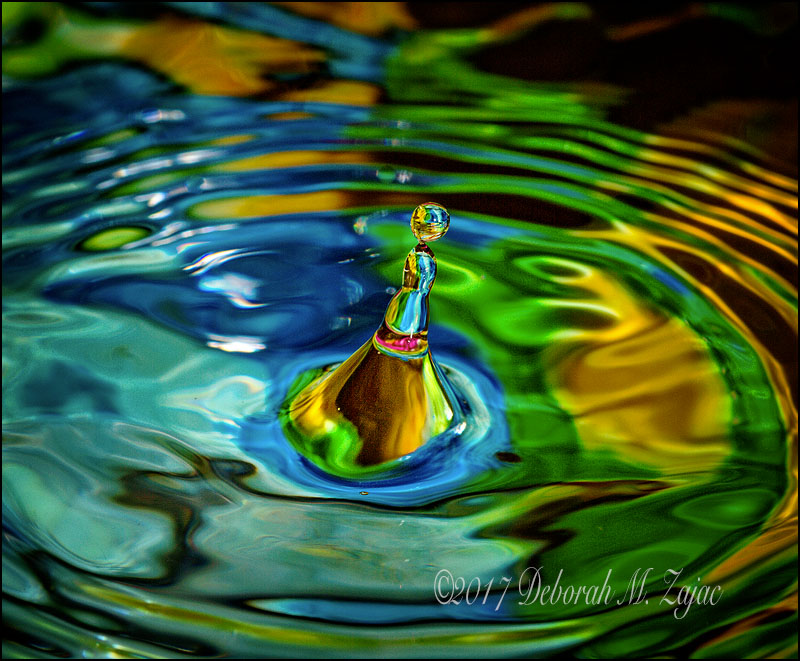
Balancing Act
SPLASH!
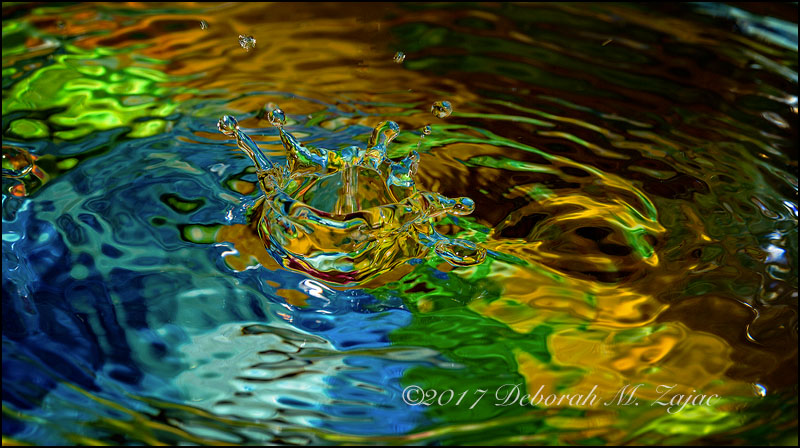
Settings: I used F/16 and F/18, 1/1000s and 1/1600s, ISO 100, Manual Priority|Matrix metering| Manual Focus: I developed these 3 frames in PS CC 2017 & On 1.
I shot about 100 frames then transferred them all to a memory stick to upload to my desktop computer. Once there I culled the images down from 100 to 33.
It has been 3 yrs since I last set up to shoot water drops and splashes (here). I forgot how challenging and fun it is trying to catch the drops and splashes at just the right time.
You don’t need a Speedlight or wireless trigger to make this type of shot. A continuous light bulb in a shop clamp light would work! You’d probably want to diffuse it with some tracing paper, velum paper, or shear white shower curtain though. Be aware that bulbs can get very hot so keep your diffusing material several inches away from the light!
I hope you found this interesting, and I hope you give it a go! If you do let me know how you did and please post your images. I’d love to see your results!
More to come…


You must be logged in to post a comment.